
Cool way to add a custom font to your next experience theme.
- First create your theme using Theme Builder.
- Find a cool font family and get a ttf file.
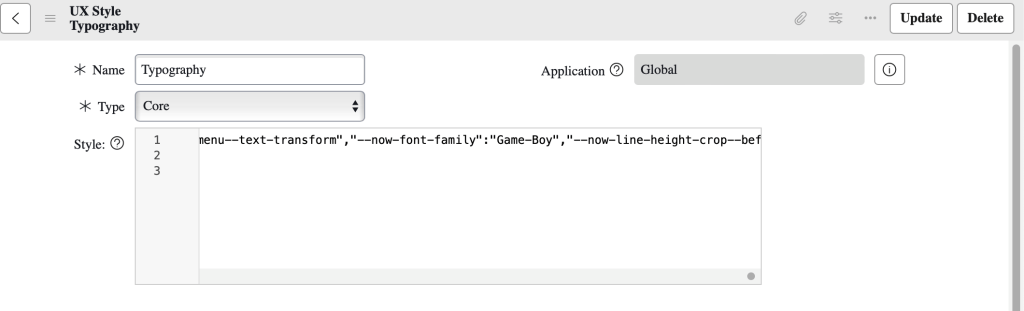
- Open the theme record (sys_ux_theme) that you just created, and click on Typography.
- In the UX Style Assets related list, click new. Select Font as the category, attach the ttf file and give it a name.
- Go back to the Typography record, and in the style replace enter the name into the font family. E.g. “–now-font-family”:”nameFromStep4″.
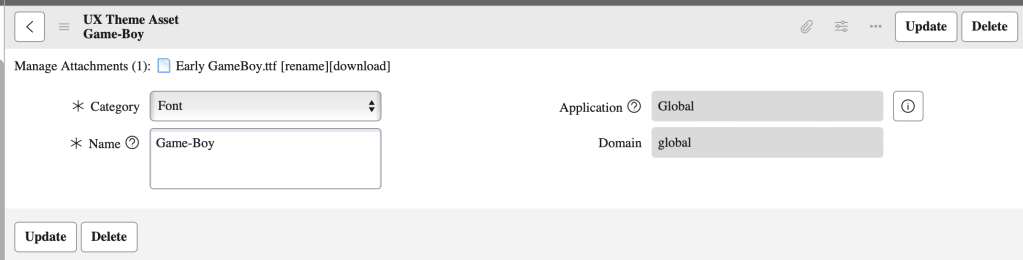
And that it! For this example, I downloaded a “Game Boy” font from the web and used this.
The results are pretty cool!

